Upload Plugin Guide
This guide walks you through uploading the Fuel Analysis Plugin bundle and configuring it to appear in the Tracking portal sidebar. After completing these steps, users will be able to access the Fuel Analysis feature directly from the Tracking sidebar navigation.
Prerequisites
Before starting, ensure you have:
- Access to the Management Portal with admin privileges
- The Fuel Analysis plugin JavaScript bundle file (
.js), available from either:- Local build:
fmdp-plugins/fuel-analysis-plugin/dist/test/directory - GitHub repository: fmdp-plugins (download the latest build artifact from the
fuel-analysis-pluginpackage)
- Local build:
Step 1: Navigate to Plugins Settings
- Log in to the platform
- On the Application Selection page, select a client (e.g., "Fmdp") and click Management Portal
- Once inside the Management Portal, click the profile menu on the top-right corner of the header
- Select Settings from the dropdown menu
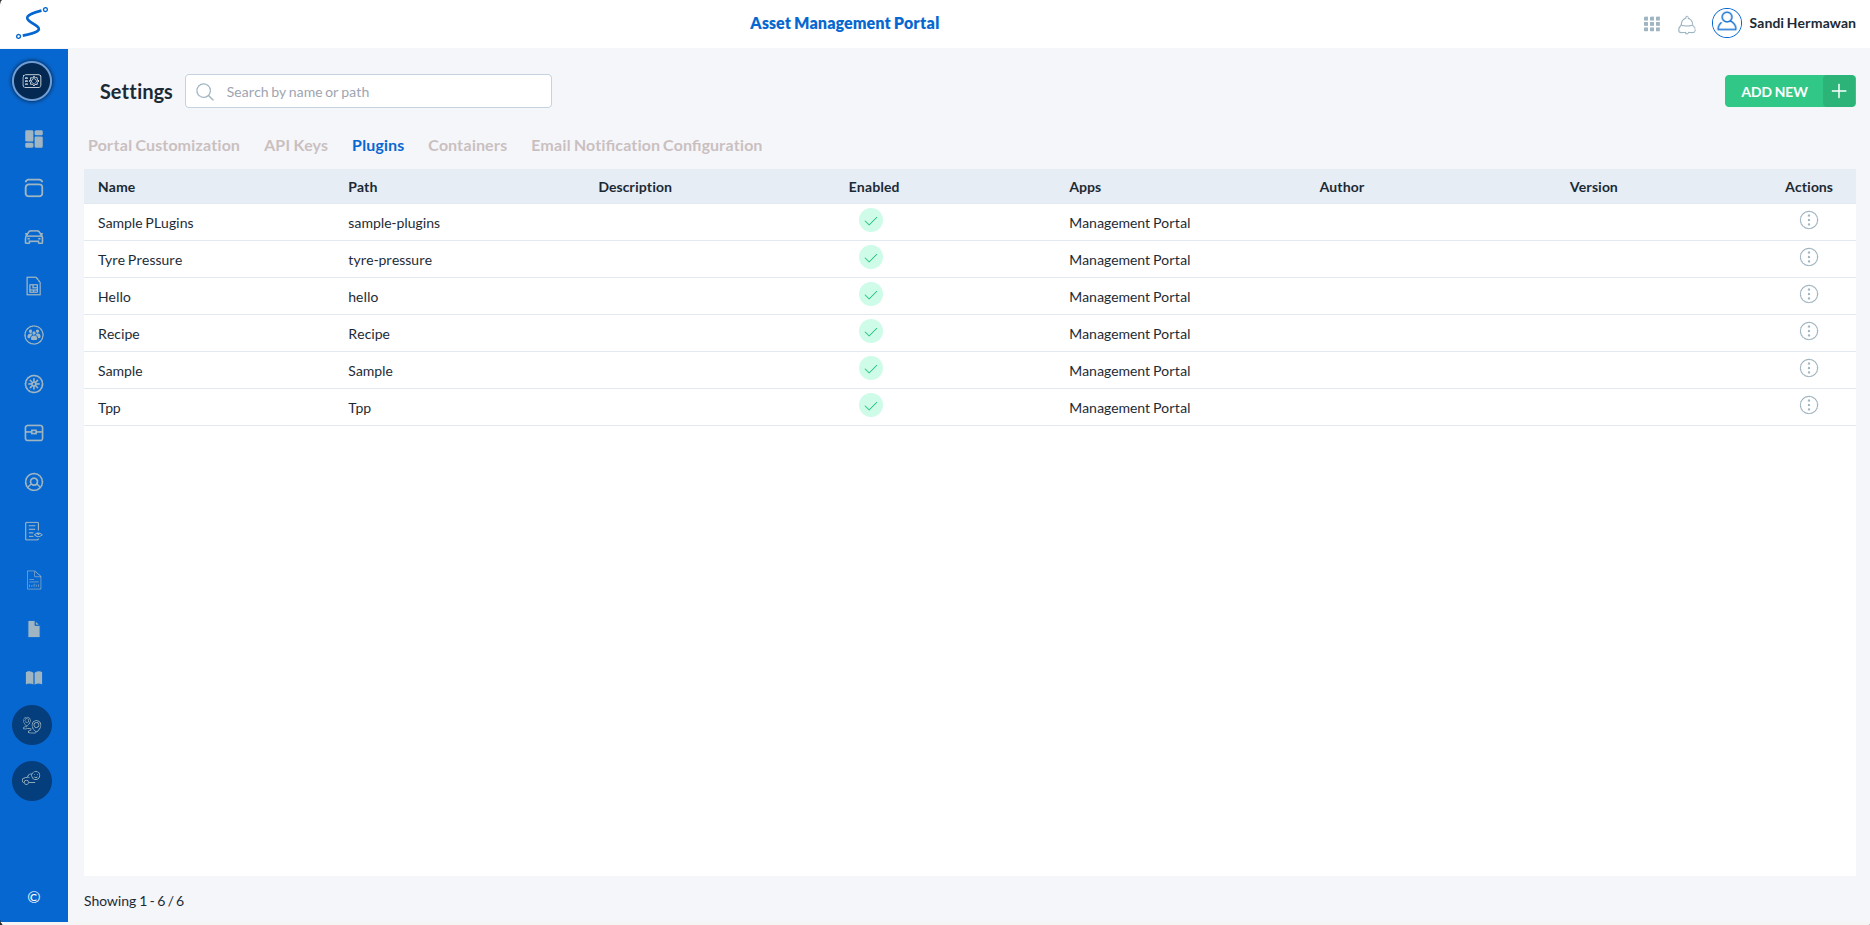
- Click on the Plugins tab in the Settings navigation menu
You will see the Plugins Manager page listing all registered plugins.
Step 2: Add New Plugin
- Click the ADD NEW button (green button at the top-right corner)
The "Add Plugin" dialog will appear with the following fields:
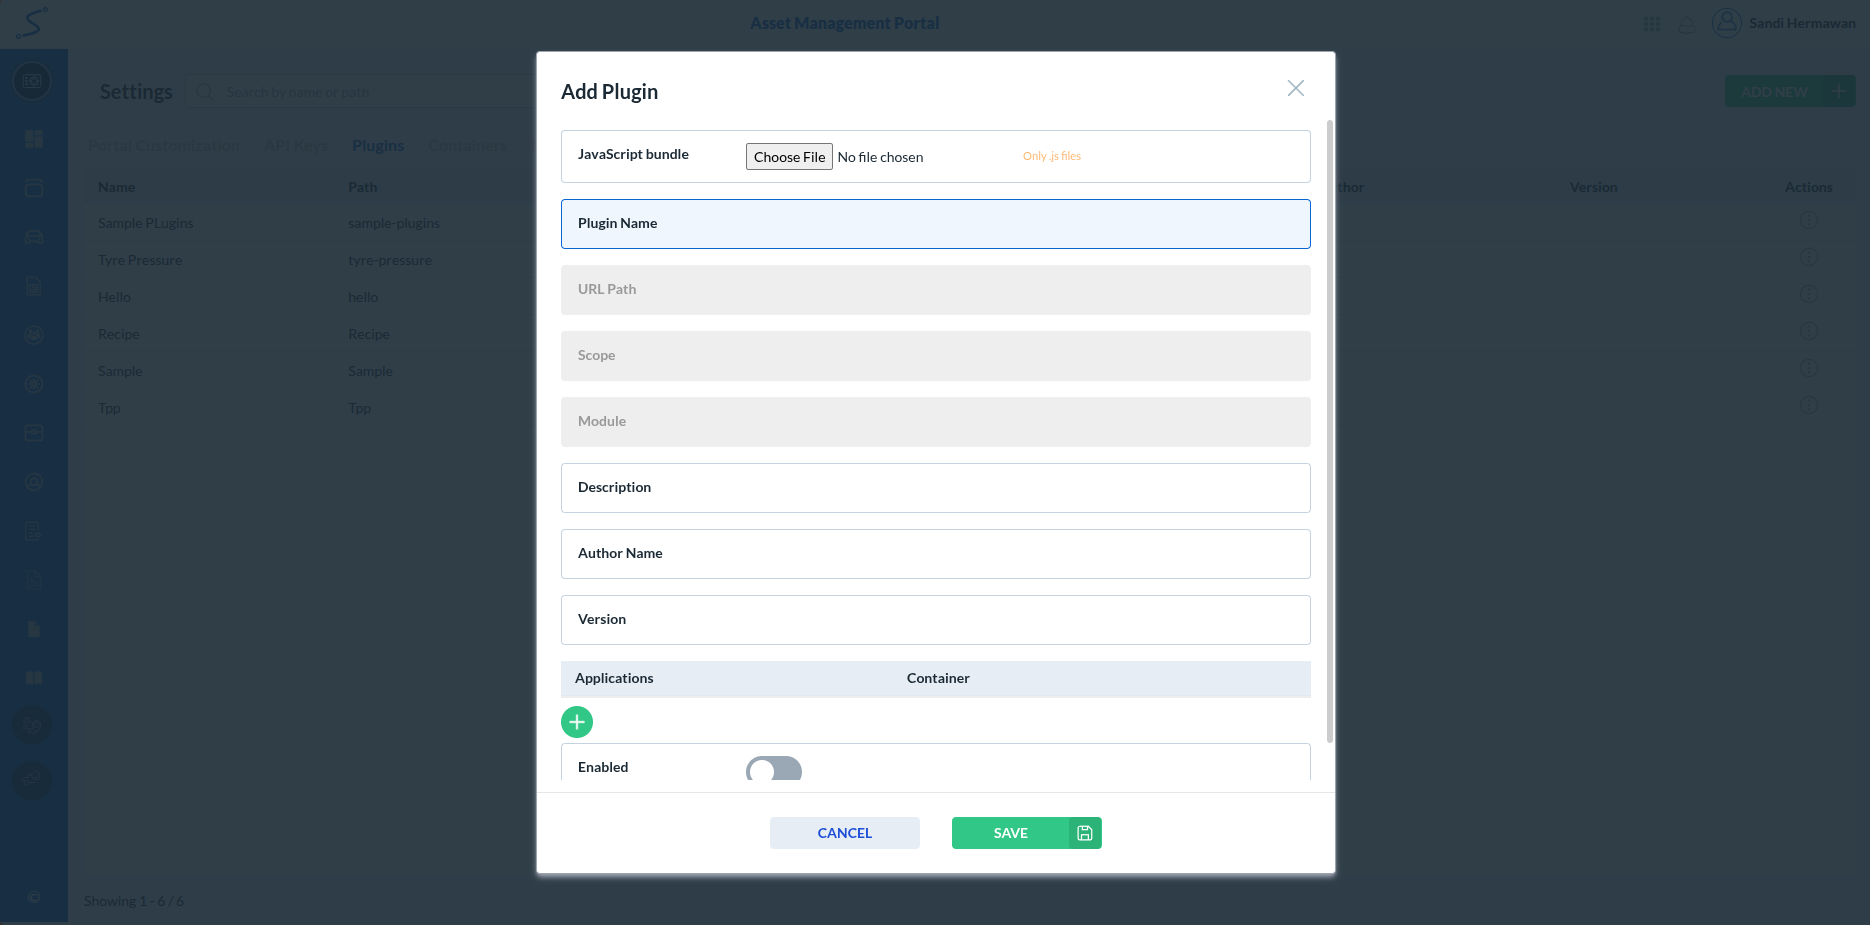
- Fill in the plugin details:
| Field | Value | Notes |
|---|---|---|
| JavaScript bundle | Click "Choose File" and browse to the .js bundle | Navigate to the build output folder or use the file from GitHub |
| Plugin Name | Fuel Analysis | The display name shown in the plugin list |
| URL Path | (auto-generated) | Automatically populated based on the plugin name |
| Scope | (auto-generated) | Automatically populated from the bundle metadata |
| Module | (auto-generated) | Automatically populated from the bundle metadata |
| Description | Fuel Analysis Plugin | Brief description of the plugin functionality |
| Author Name | Your name (e.g., Sandi Hermawan) | The plugin author |
| Version | 1.0 | Plugin version number |
| Applications | (leave empty) | Do not select any application at this step |
| Container | (leave empty) | Do not select any container at this step |
| Enabled | Toggle ON | Enable the plugin immediately |
Leave the Applications and Container fields empty at this step. The container will be configured separately in Step 3.
- Toggle the Enabled switch to ON
- Click Save
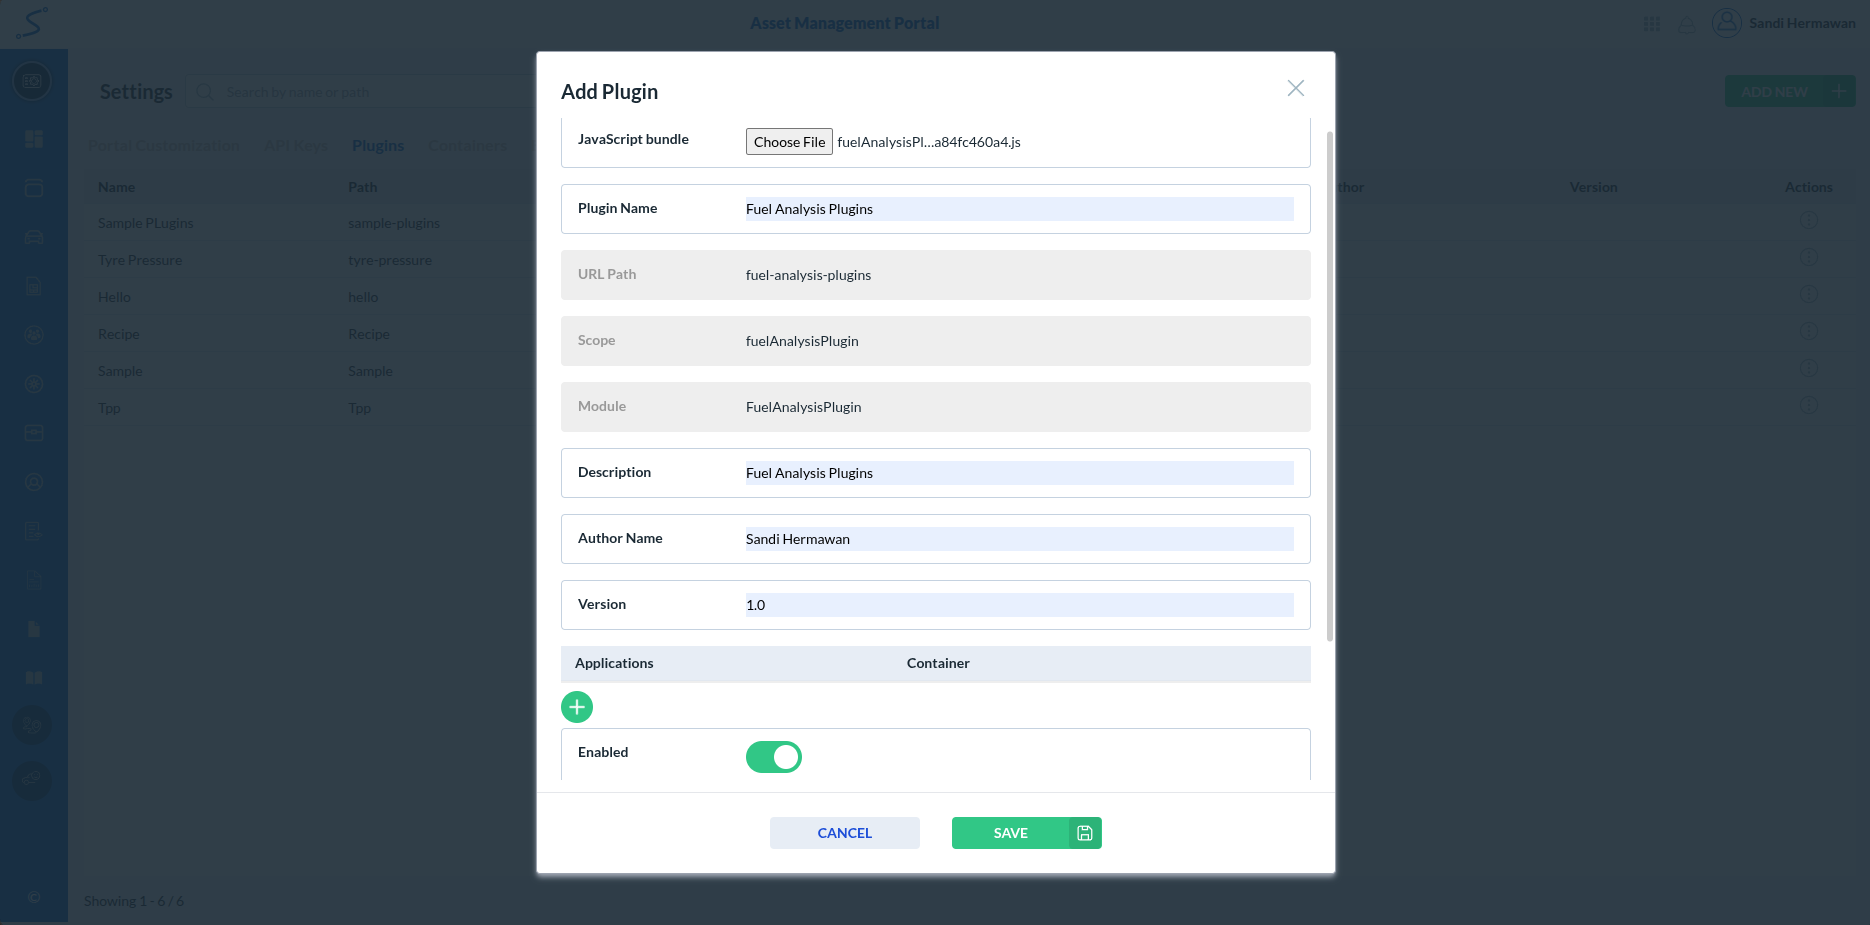
After saving, the plugin will appear in the Plugins list with a green checkmark indicating it is enabled.
Step 3: Create a Container
A container defines how and where the plugin is displayed in the portal navigation. To show the Fuel Analysis plugin in the Tracking sidebar, you need to create a container for it.
- In the Settings page, click on the Containers tab
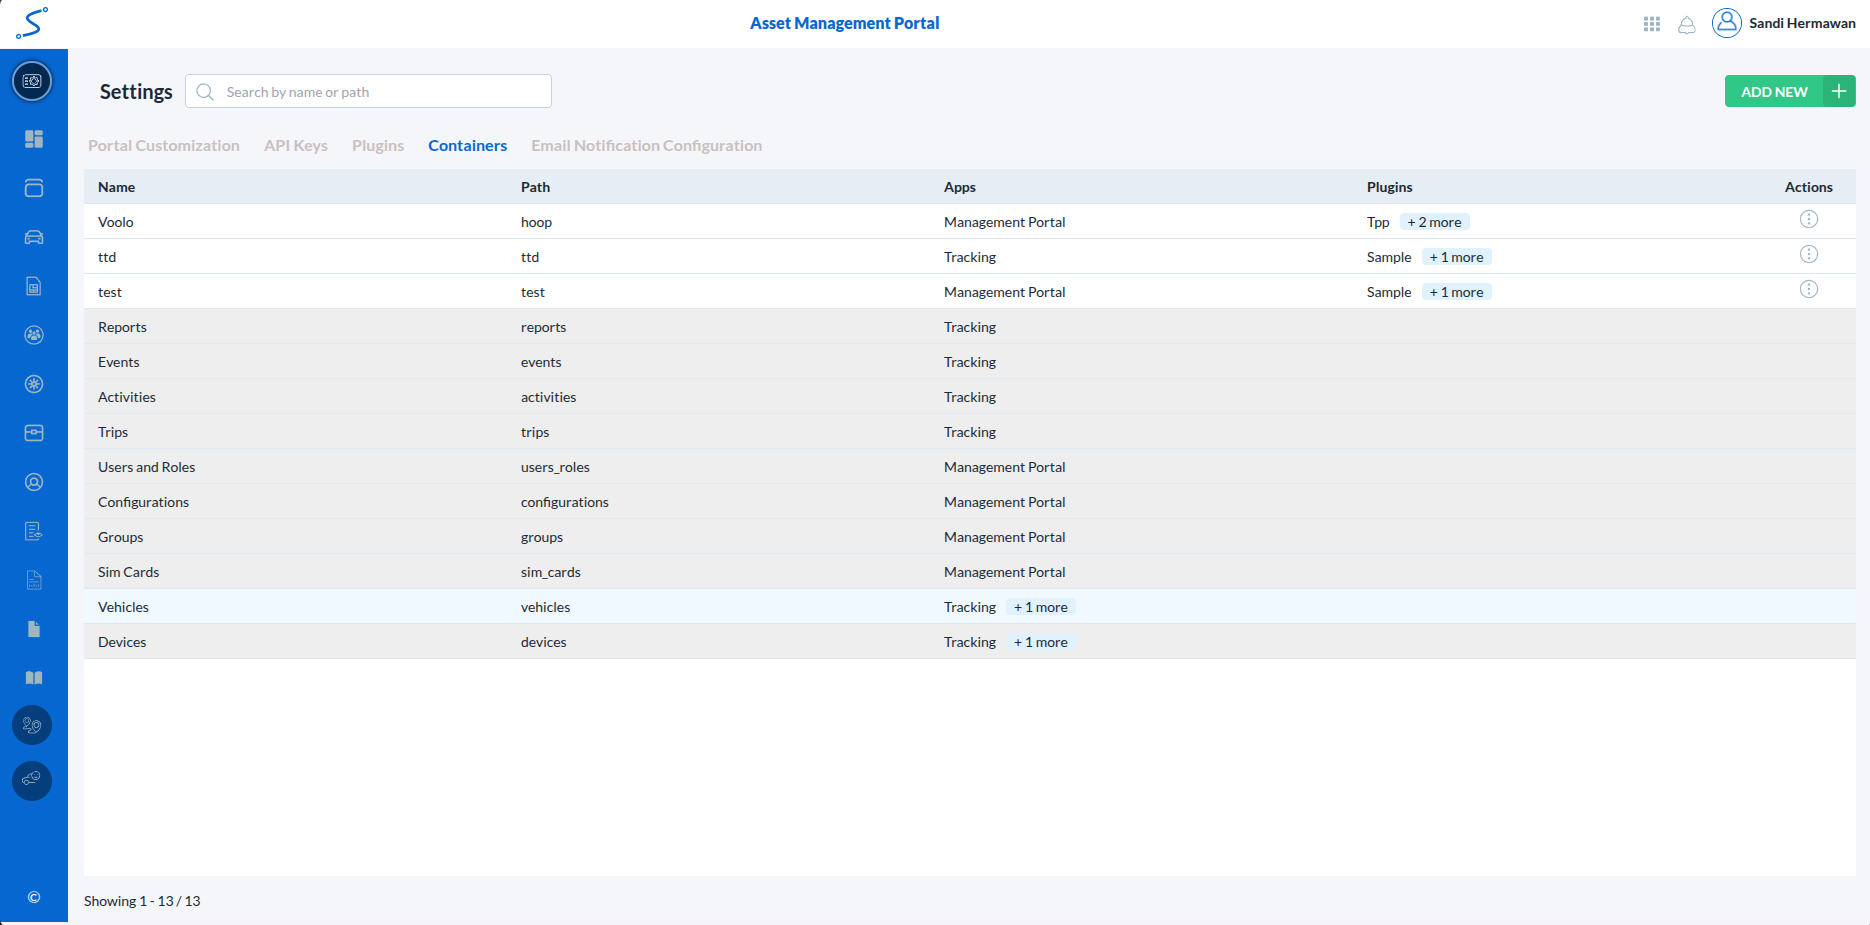
- Click the ADD NEW button
The "Add Custom Plugin Container" dialog will appear:
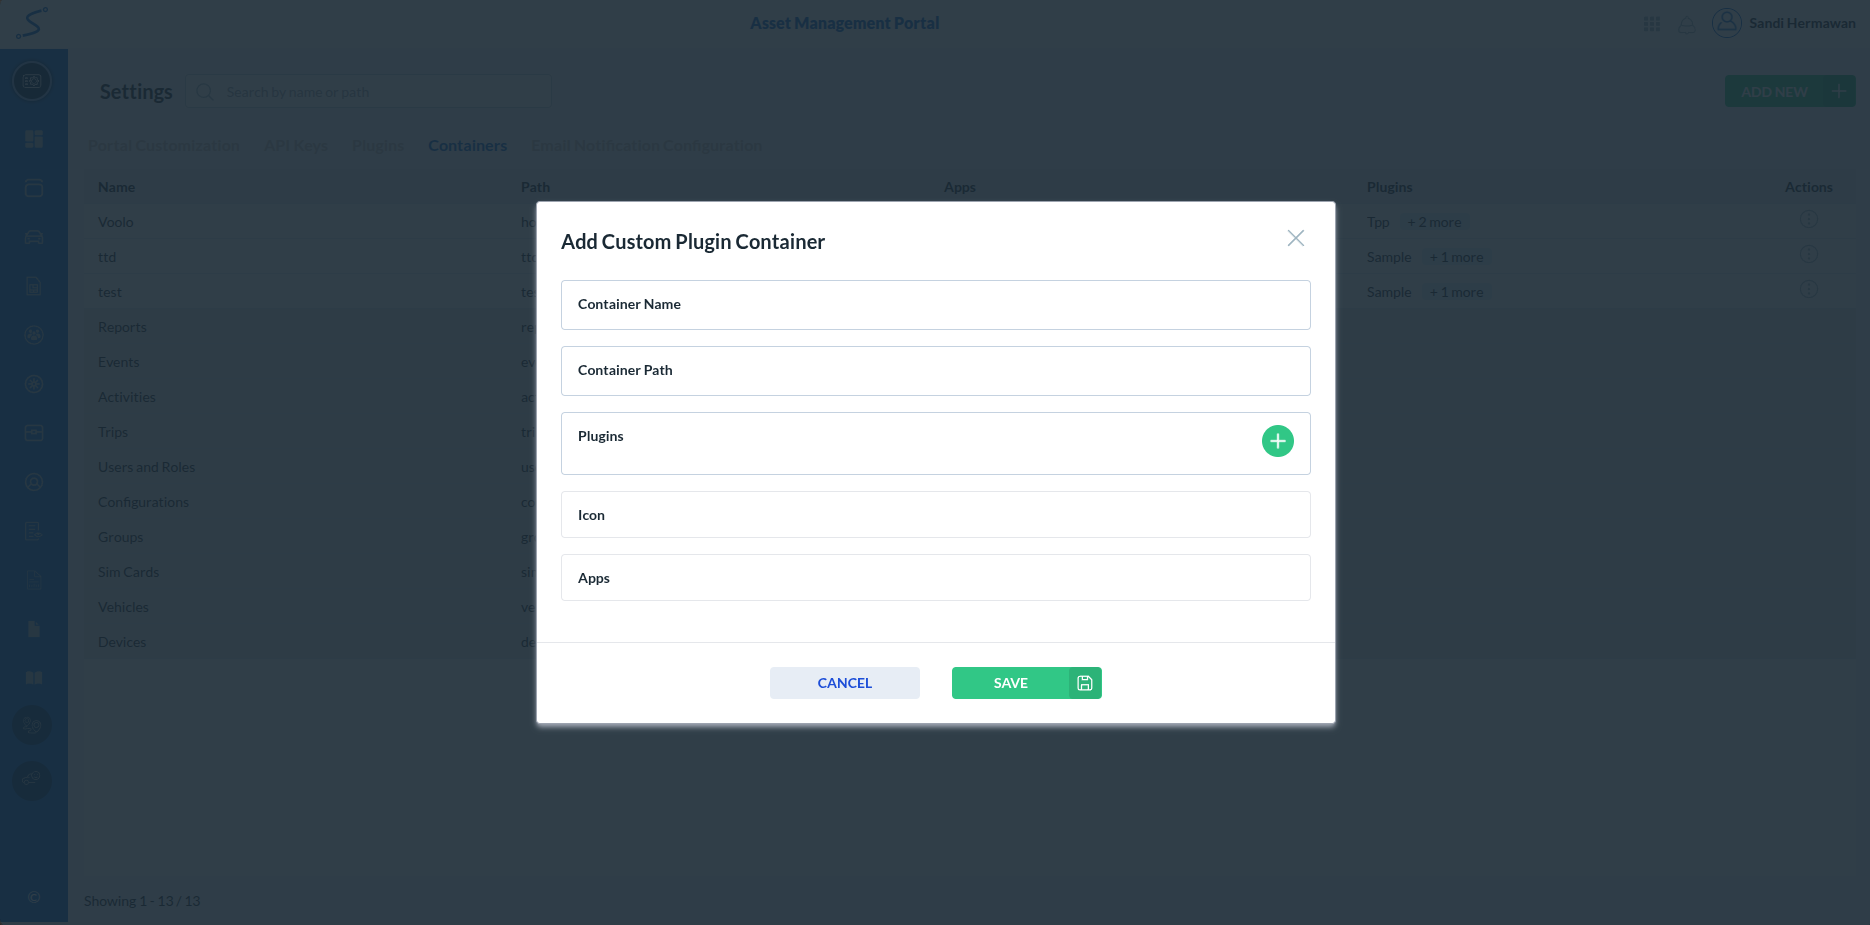
- Fill in the container details:
| Field | Value | Notes |
|---|---|---|
| Container Name | Fuel Analysis | Display name shown in the sidebar |
| Container Path | fuel_analysis | URL path segment (use underscores, no spaces) |
| Plugins | Select the plugin created in Step 2 | Click the "+" icon and choose "Fuel Analysis" |
| Icon | Choose an appropriate icon | Select from the available icon list |
| Apps | Select Tracking | This determines which portal sidebar shows the container |
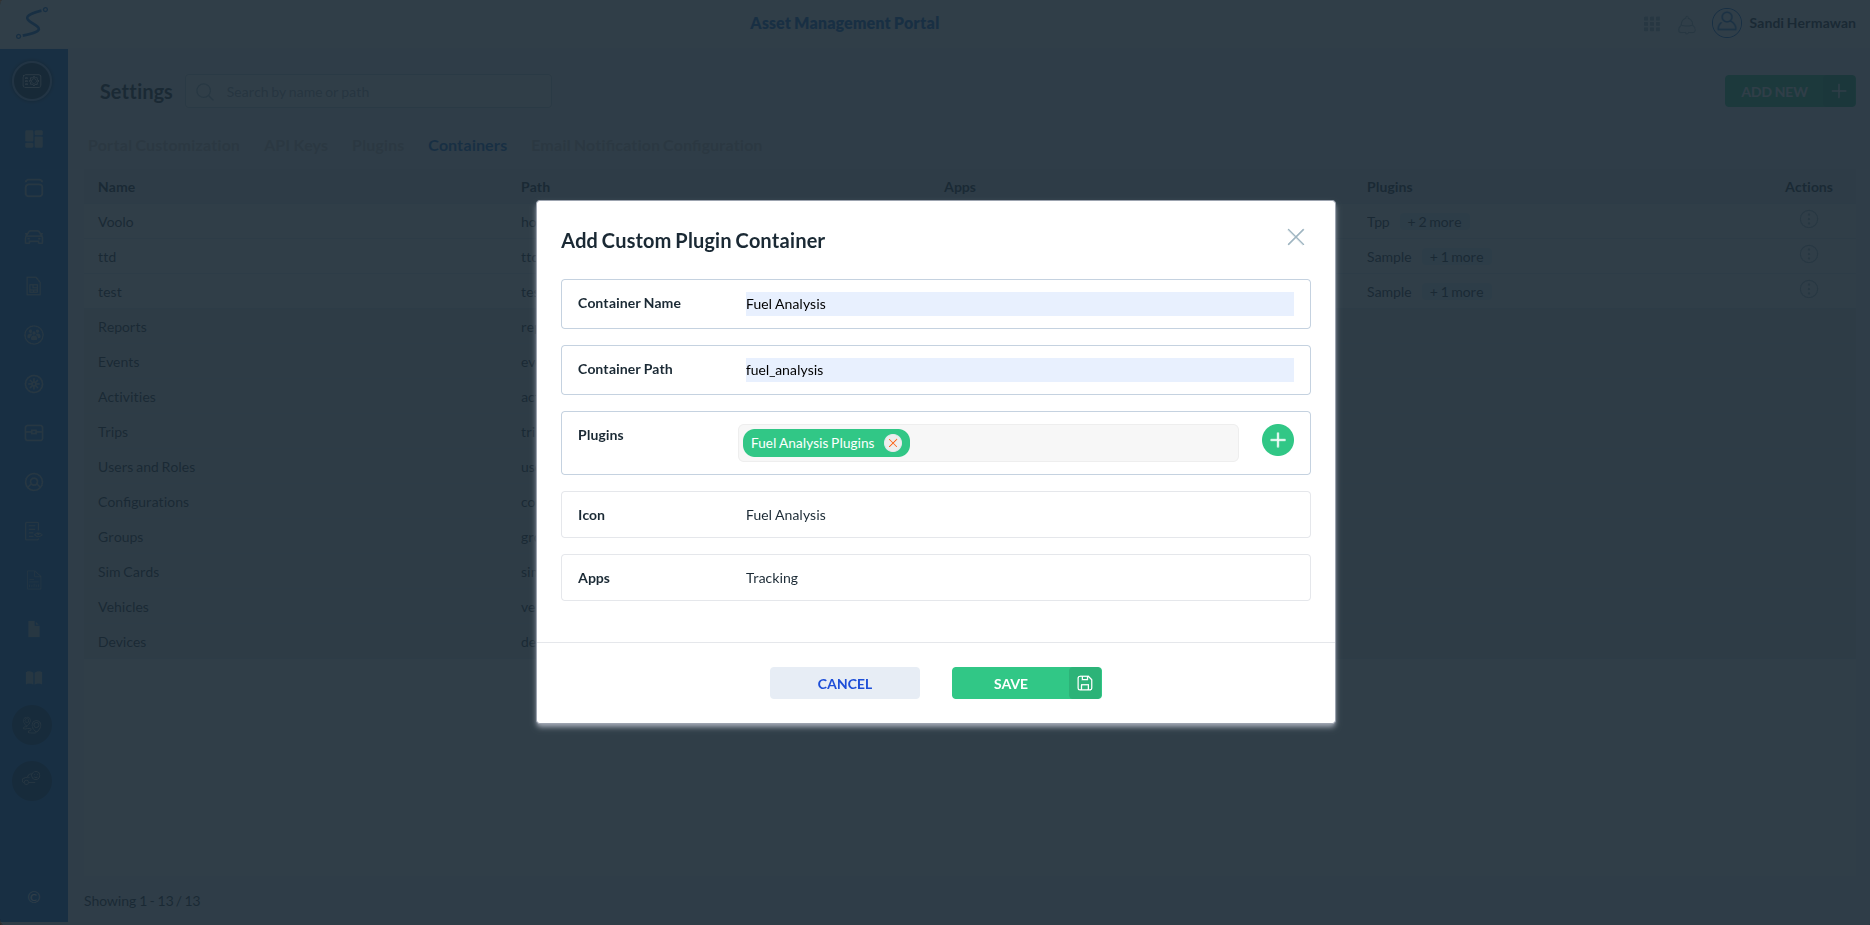
- Click Save
The Container Path value (fuel_analysis) becomes part of the URL. For example, the plugin will be accessible at /tracking_portal/container/fuel_analysis.
Step 4: Verify in Tracking Sidebar
After creating the container with the "Tracking" app selected, the Fuel Analysis menu item will appear at the bottom of the Tracking portal sidebar.
- Navigate to the Tracking portal (switch apps using the app switcher in the header)
- Look at the sidebar navigation — you should see Fuel Analysis at the bottom

- Click on Fuel Analysis to open the plugin interface
The plugin will load inside the Tracking portal layout, maintaining the same sidebar navigation and header. Users can switch between Tracking features and the Fuel Analysis plugin seamlessly.
Summary
| Step | Action | Location |
|---|---|---|
| 1 | Log in, select client, open Settings → Plugins | Application Selection → Management Portal → Profile Menu → Settings → Plugins |
| 2 | Upload plugin bundle and configure | Add New Plugin dialog |
| 3 | Create container with Tracking app | Settings → Containers → Add New |
| 4 | Verify in Tracking sidebar | Tracking Portal → Sidebar |
Troubleshooting
| Issue | Cause | Solution |
|---|---|---|
| Plugin not appearing in sidebar | Container not linked to "Tracking" app | Edit the container and ensure "Tracking" is selected in the Apps field |
| Plugin shows blank page | JavaScript bundle not loaded correctly | Verify the .js file was uploaded successfully and the plugin is enabled |
| "Add Plugin" save fails | Missing required fields | Ensure Plugin Name, JavaScript bundle, and Enabled toggle are set |
| Container path conflict | Path already used by another container | Choose a unique path value (e.g., fuel_analysis_v2) |
Related Documentation
- Fuel Analysis Setup Guide — Full integration setup including backend, custom fields, and device configuration
- Plugins Overview — Plugin framework and management overview